How to Break 100: The Six Things That Are Actually Keeping You There

The most common advice for breaking 100 is swing instruction. Fix your grip, fix your takeaway, fix your impact position, and then you'll finally get there. The problem is that the gap between 105 and 99 is almost never a mechanics gap.
Strokes gained research on amateur golfers consistently shows a pattern: players shooting in the high 90s to low 100s lose the majority of their excess strokes not to poor contact, but to penalty shots, three-putts, and poor target selection. [verify: attribute to Arccos, Shot Scope, USGA handicap data, or Broadie's research] Fix the decisions, and the scorecard moves before the swing does.
This is a decision-making guide, not a swing guide. The six points below won't change your swing; they'll change where your ball ends up and how many times you're tapping in versus three-putting. For most golfers above 100, these changes have more immediate impact than any lesson.
- 1Penalty shots are the single largest score killer above 100. One OB shot costs two strokes. Eliminating two penalties per round is worth as much as making a birdie, and it's far more achievable.
- 2Three-putts come from the first putt, not the second. Getting the ball within 3 feet (0.9 m) on a 30-foot (9.1 m) lag putt is the target, not holing it.
- 3Aim at the center of the green on approach shots. Flagging at the pin from 150 yards (137 m) rewards a 4-handicapper; for a 25-handicapper it adds strokes, not removes them.
- 4With chips and pitches, getting on the green in one shot matters more than the quality of the shot. A poor chip that rolls onto the green saves more strokes than a better-looking one that doesn't.
- 5Hit iron or 3-wood off tees where driver puts the ball in trouble. The ego cost is real; the scoring benefit is also real.
- 6One round with a stroke-loss tally by category (penalty/three-putt/chunked chip) shows exactly where to focus. Most golfers are surprised by what the data says.
1. Understand where your strokes actually go
A round of 100 on a par-72 course is 28 over par. Most golfers attribute that gap to general ball striking: "I hit it all over the place." The tracking data tells a more specific story.
Amateur round data from handicap-tracking services consistently shows that golfers in the 25 to 35 range lose strokes to a concentrated set of causes. A rough breakdown for a typical 100 round: two to five penalty strokes (OB, lost ball, water hazard), four to six three-putts, three to five chips or pitches that miss the green entirely, and the remainder spread across approach play and full-swing misses. [verify: name source; handicap-tracking service data] The full-swing problems exist, but they account for less of the total than most players assume.
The implication: a golfer who eliminates two penalty shots per round and converts two three-putts into two-putts saves four strokes without changing their swing. That moves a 100 shooter into the high 90s. Understanding which category is driving the score is the first step, which is why the scorecard audit in section 6 belongs in every golfer's toolkit.
2. Eliminate penalty shots on tee shots
Every OB ball costs two strokes: the shot you played and the stroke penalty. Every ball that finds water typically costs one stroke penalty plus the unfavorable drop position. Two to five of those per round is a four-to-ten stroke problem, and it's almost entirely a decision problem, not a ball-striking one.
The fix is target selection, not swing mechanics.
On tee shots where driver has a meaningful chance of reaching OB, water, or thick rough, leave it in the bag. A 3-wood or long iron hit consistently to the fairway produces a longer approach but a playable one. A driver that occasionally reaches trouble produces a penalty stroke and the kind of frustration that compounds into worse decisions on the next few holes.
The mental barrier is real (James included: there are tee boxes where the launch monitor data clearly says iron, and the hand still reaches for the driver). But the scorecard counts where the ball ends up, not which club you hit.
A practical rule: on any tee where driver requires the ball to carry or avoid a hazard within 20 yards (18 m) of your realistic maximum distance, hit something else. That's a more useful heuristic than trying to estimate probability in the moment.
The bag mapping guide covers how to build accurate distance numbers for each club with a launch monitor, which gives you the input you need to apply this rule consistently.
3. Fix the three-putt problem
Three-putts don't come from the second putt; they come from the first. A golfer who consistently lags a 30-foot (9.1 m) putt to within 3 feet (0.9 m) of the hole will rarely three-putt. A golfer who leaves that same putt 8 to 10 feet (2.4 to 3 m) away will three-putt often.
The goal of a long lag putt isn't to hole it. The goal is to get the ball close enough that the second putt is a tap-in. This is a fundamentally different intention, and it changes both how you read the green and where you aim.
Two things help:
Distance control over line. On putts over 25 feet (7.6 m), misjudging the distance costs more than misreading the line. A putt hit to the right speed that finishes 2 feet (0.6 m) left of the hole is a makeable second putt. A putt hit to the wrong speed that finishes 8 feet (2.4 m) short or long is not. Prioritize getting the speed right.
Use the whole hole. Aim for a 3-foot (0.9 m) circle around the hole, not the center of the cup. Any ball in that circle is a tap-in. Expanding the mental target expands the margin for error on the first putt.
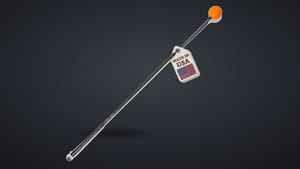
For golfers who want to train distance control at home, a lag putting training aid provides immediate feedback without a practice green. Setting up targets at 3 feet (0.9 m) and working backward from various starting distances is a straightforward format that directly addresses the first-putt problem.
4. Get on the green with every chip and pitch
For a golfer above 100, the quality of a chip shot matters less than its outcome. A slightly chunked chip that rolls onto the green and finishes 15 feet (4.6 m) from the hole is better than a thin chip that runs through the green or a skull that flies over it. The goal of every chip and pitch is to be putting from the green.
This sounds obvious, but the failure mode is common: trying to avoid chunking leads to deceleration through the shot, which causes exactly the chunked or thinned result the golfer was trying to prevent. Commit to the shot and accept an imperfect result on the green; it almost always saves more strokes than a more cautious approach that misses the surface.
A useful simplification for chipping: choose the least-lofted club that gets the ball onto the putting surface quickly and lets it roll out. A 7-iron bump-and-run from 20 feet (6.1 m) off the green with plenty of green between the ball and the hole is often more reliable than a lob wedge. The bump-and-run can be played with a putting-style stroke; the high lob requires more precision in timing and face control. Match the shot to the reliable execution, not to the impressive-looking one.
5. Aim at the middle of the green, not the flag
Most approach shots for a golfer above 100 should be aimed at the center of the green, not the flag.
Research on amateur shot dispersion suggests that a golfer with a 25 handicap has a typical lateral spread of 30 to 40 yards (27 to 36 m) on shots from 150 yards (137 m). [verify: MyGolfSpy dispersion data, Trackman amateur stats, or similar] Aiming at a flag on the right side of the green means roughly half those shots miss the green right. Aiming at the center of the green means a 15 to 20 yard (13 to 18 m) error in either direction still finds the putting surface.
Bogey golf is the goal for a golfer trying to break 100. Bogey on a par 4 means being on the green in two shots and two-putting. The approach shot's job is to get on the green anywhere, not to set up a birdie putt.
Two exceptions worth making: when the flag is in the center of the green, aim at the flag. When the flag is near a bunker or water on one side, aim away from the trouble and accept a longer putt. In both cases, the principle is the same: maximize the chance of being on the green in regulation, not of hitting a great shot.
6. Run a one-round scorecard audit
Most golfers have a vague sense of where they're losing strokes. "I three-putted a lot" or "I couldn't get out of the rough." The scorecard audit makes it precise.
For one round, track each stroke by category as you play. A simple tally in the notes section of a scorecard works fine. Track these five categories:
- Penalty strokes (OB, lost ball, water, unplayable lie)
- Three-putts
- Chips or pitches that miss the green entirely
- Approach shots that miss the green by more than one club length
- Everything else (full shots hit reasonably well that still cost strokes)
At the end of the round, the distribution tells you where to focus. If six to eight of your excess strokes are penalty shots, tee shot management is the lever. If eight to ten are three-putts, lag putting practice is the lever. If the strokes are spread across categories two through four, the decision-making changes in sections two through five above are the right starting point.
Most golfers who run this audit are surprised by how concentrated the damage is. The round feels like a series of general failures; the audit usually reveals two or three specific, fixable categories accounting for the majority of the gap.
Frequently Asked Questions
Do I need lessons to break 100?
Not necessarily, and for most golfers stuck above 100, course management changes will move the score faster than swing changes. That said, if your ball striking is genuinely inconsistent, one or two lessons focused on contact quality can remove the ceiling on what the decision-making improvements can achieve. The right sequence: work through the strategies here first, then assess what's limiting you from getting below 90.
What's the fastest way to stop three-putting?
Focus on the first putt, not the second. From 30 feet (9.1 m) or more, the goal is to finish inside a 3-foot (0.9 m) circle around the hole, not to hole the putt. Ten minutes of lag-putting practice before a round, hitting putts from 30 to 40 feet (9.1 to 12.2 m) and trying to stop each ball within that circle, builds the distance control needed to eliminate three-putts without any change to your stroke mechanics.
Should I use driver on every tee?
No. Driver is the right club when it advances the ball safely and sets up a better approach than a shorter club would. On holes where driver has a meaningful chance of finding OB, water, or thick rough, a 3-wood or iron hit to the fairway produces a shorter approach but a playable one. Over 18 holes, the golfer who makes disciplined club selections on the tee almost always beats the golfer who hits driver everywhere and absorbs the consequences.
What to do next
A one-round stroke-loss tally by category is the fastest way to identify your specific gap. If penalties are the main driver, the tee shot decisions in section 2 are the place to start. If three-putts dominate, 10 minutes of lag-putting practice before each round will move the number faster than almost anything else you can work on.
The bag mapping guide covers how to build accurate carry distances for every club with a launch monitor, which gives you the information needed to make confident tee shot decisions before each hole.
Some links in this article are affiliate links. If you buy through them, I earn a small commission at no extra cost to you. This never influences what I recommend. I link to gear I'd buy myself.







The golf newsletter that cuts the hype
Data-backed reviews and advice that works. No brand spin.
Recommended products