









how-to
How to Set Ball Position for Every Club
Ball position isn't a single spot you set once and reuse for every club in the
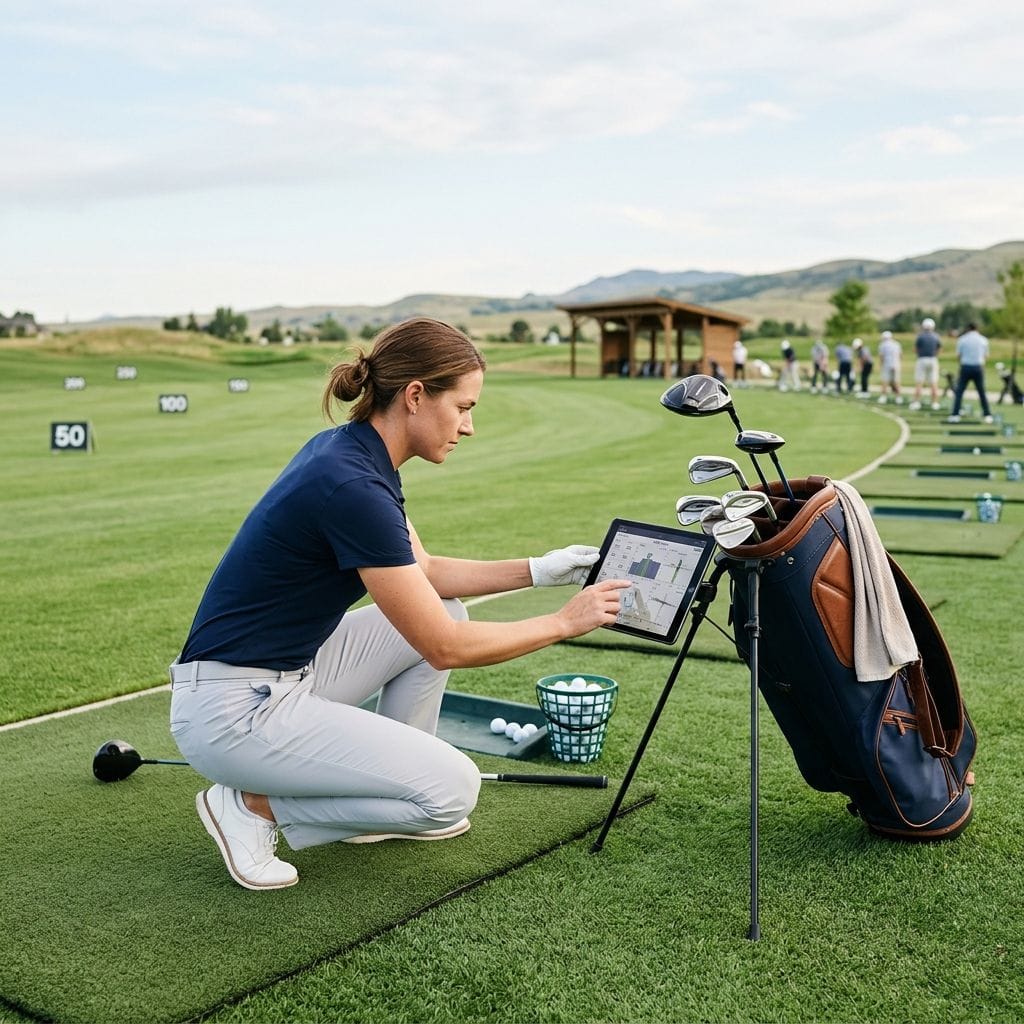
Most golfers don't know their real carry numbers. They've got a rough idea of how far their seven-iron goes on a good swing, and they've had enough rounds where that estimate was off by 15 yards to know it costs them. But they've never actually measured it in a controlled session.
Here's the problem with running on estimates: you can't spot a gap you can't see. If you're consistently missing approaches at a particular yardage, the issue might not be the swing. It might be that no club in your bag actually covers that distance reliably.
A bag mapping session with a launch monitor fixes that in an afternoon. You'll get real carry numbers for every club, identify coverage holes and overlaps, and have the data to make actual decisions about your setup. This is the guide.
TL;DR
A distance gap is a yardage range no club in your bag covers reliably. An overlap is two clubs carrying the same distance, occupying two bag slots while the distance they'd cover with better loft spacing goes unclaimed.
Research by Columbia Business School professor Mark Broadie, whose strokes-gained methodology was published in "Every Shot Counts" (Columbia Business Press, 2014), is the clearest evidence for why this matters. Broadie's data shows that amateur golfers lose more strokes to scratch from the 100-to-200-yard (91 to 183m) range than from any other zone on the course. Distance control from mid-range approaches is the central scoring variable separating mid-handicap players from single figures.
A 20-yard (18m) gap in your bag means roughly one-third of the approach yardages in that zone have no reliable club assignment. You under-club and come up short, or over-club and go long, and both outcomes push your next shot further from the pin than a well-gapped bag would have allowed. I genuinely don't understand why this session isn't standard practice for more amateurs.
Overlaps cost differently. Two clubs carrying the same distance consume two bag slots while the ground they could have covered stays unclaimed.
Not every consumer launch monitor separates carry (airborne distance) from total distance (carry plus roll). For bag mapping, carry is the number you're building from. It's what an approach shot produces from a tight lie, where the ball stops close to where it lands rather than releasing.
Three reliable options at the consumer level, all available on Amazon:
For the full comparison including additional options under $1,000, see the complete consumer launch monitor guide.
For bag mapping, absolute accuracy matters less than internal consistency. You're comparing one club to another within the same session, not validating manufacturer specs. Any of these three will produce data reliable enough to make real decisions.
Don't use the gapping session as your warm-up. Arrive ready to swing at full speed. 15 minutes of progressive swings from short irons up through mid-irons before you begin ensures your numbers reflect what you bring to the course, not a half-warmed body trying to flush it on shot two.
Outdoor, on a range or short-game area with a firm, consistent surface. Wind is the biggest source of session noise. Below 10 mph (16km/h) is workable; above 15 mph (24km/h), reschedule or log the wind direction and speed for your records.
Temperature matters too. Carry drops in cold, dense air. A session at 45°F (7°C) will read shorter than the same clubs at 80°F (27°C). Note the conditions on your recording sheet so future comparisons stay honest.
A spreadsheet works best. You need these columns for each club: shot number, carry distance, total distance, ball speed, and smash factor. You'll add an average row per club after dropping the outliers.
Step 1: Set your shot volume at 10 per club
Hit 10 shots per club. After the session, drop the highest and lowest carry reading for each club, then average the remaining eight. This is standard protocol in professional club fitting: it removes the one flush strike and the one thin contact that don't represent your typical ball-striking pattern.
If you're short on time, eight shots with two outliers dropped gives you 6 data points. Below 6, the average loses enough reliability to skew your decisions.
Step 2: Work from pitching wedge up to driver
Start at the short end of the bag and work up in order: pitching wedge, gap wedge (if you carry one), nine-iron, eight-iron, seven-iron, six-iron, five-iron, four-iron or equivalent hybrid, five-wood or hybrid, three-wood, driver.
Starting short calibrates your feel and gets contact consistent before you move to the longer clubs. By the time you reach the driver, your swing is fully into the session. Take at least 60 seconds between clubs; sessions that rush the transitions tend to show artificially low numbers in the second half of the bag.
Step 3: Record four data points per shot
For each shot, log:
Carry: Your primary number and the foundation of the whole map.
Total distance: Useful context. If two clubs show similar carry but very different total distances, one launches higher and lands softer. Carry is still your planning number for approach shots.
Ball speed: Your contact-quality signal. A significant drop in ball speed between two shots with the same club flags a likely mishit. See the ball speed and distance guide for what normal shot-to-shot variation looks like at different swing speeds.
Smash factor: Ball speed divided by clubhead speed. For mid-handicap iron shots, readings in the 1.40 to 1.48 range indicate solid contact. Readings below 1.35 suggest a mishit. Flag those rather than including them in your average as though they represent your standard strike. The smash factor explainer has the full breakdown.
Step 4: Calculate your averages
Once you've hit all 10 shots for a club, drop the high and low carry readings. Average the remaining eight. Log that number as your carry average for that club, then move to the next one.
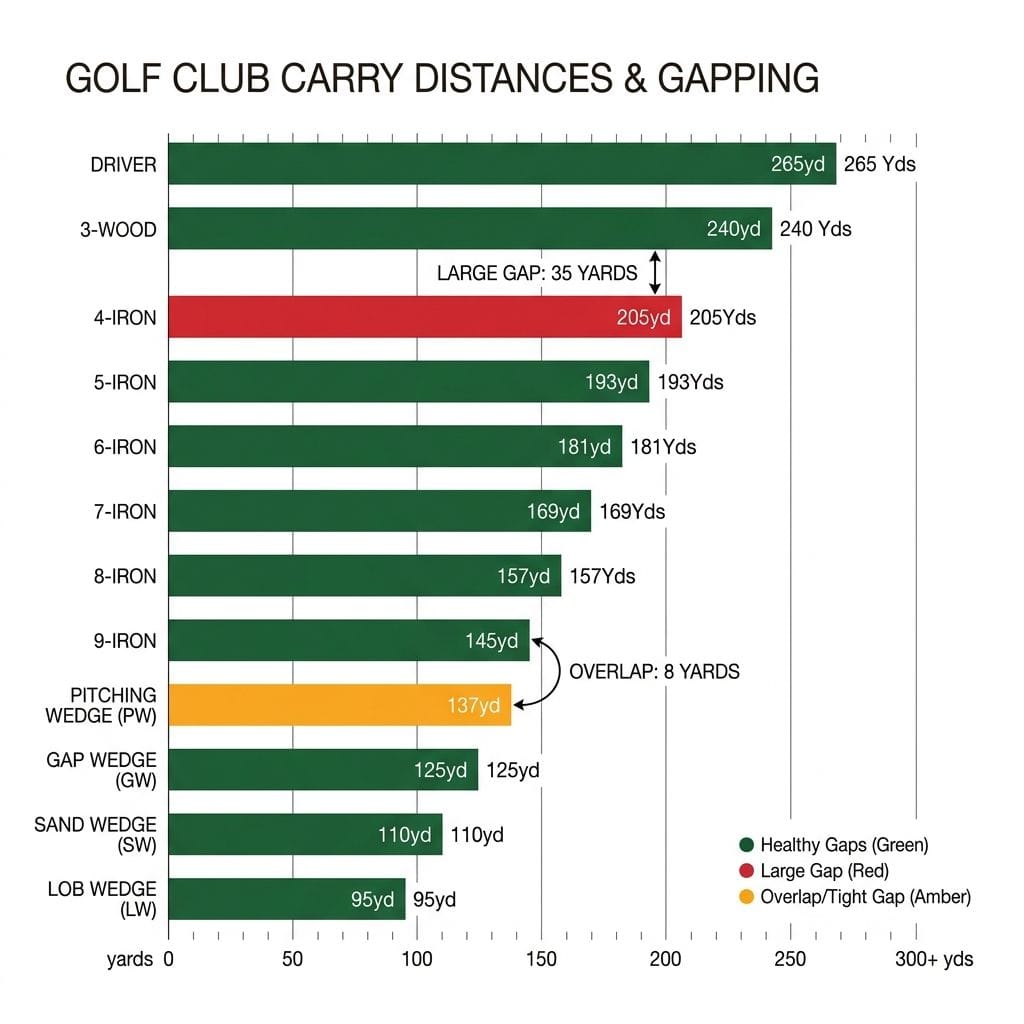
GolfWRX's Golf 101 guide "How far should my clubs go? (AKA gapping)" (GolfWRX, November 2020) puts typical mid-iron gaps at 10 to 15 yards (9 to 14m) for most golfers, with the tighter end of that range applying in the scoring zone from nine-iron down. Some natural variation exists: the pitching wedge-to-nine-iron gap tends to run smaller than the five-to-four-iron gap, because longer clubs produce more carry distance per degree of loft change.
A practical read of your numbers: adjacent clubs with 8 to 18 yards (7 to 16m) between them are reasonably gapped. A pair separated by more than 20 yards (18m) is a coverage hole. A pair separated by fewer than 5 yards (4.6m) is an overlap.
The long iron dropout. The most common coverage gap sits between the four-iron or five-iron and the lowest fairway wood or hybrid. Many golfers in the 12-to-22 handicap range carry a four-iron they rarely stripe on center. Their average carry for that club reflects what it actually does on the course, not a perfect lab swing. When the four-iron average sits within 5 yards (4.6m) of the five-iron, and the five-wood sits 25 yards (23m) above both, there's a significant hole in the 185-to-210-yard (169-to-192-m) range. That's the scenario most often fixed by a hybrid at the right loft.
The wedge cluster. A bag with a pitching wedge (typically 44 to 46 degrees) and a sand wedge (typically 54 to 56 degrees) and nothing between them can carry a 20-to-30-yard (18-to-27-m) gap right in the scoring zone. The companion article Build Your Wedge System Using Launch Monitor Data addresses this in full.
The driver-to-three-wood gap. Less common, but worth checking. If your three-wood carry average sits within 15 yards (14m) of your driver, the driver isn't adding meaningful coverage. That's typically a driver fitting issue: high spin and low ball speed keeping the driver from separating from the three-wood as it should at your swing speed. Not a bag composition problem.
If your data shows a 20-yard (18m) or larger gap between your pitching wedge and the next shortest club, a gap wedge will typically close it. Standard gap wedge lofts run 50 to 52 degrees for most modern iron sets. Before buying, verify on the launch monitor that the candidate wedge's expected carry slots into the gap rather than creating a new overlap with your pitching wedge.
If your long iron carry average sits within 10 yards (9m) of the iron below it and you're producing smash factors below 1.35 consistently with that club, the club isn't performing to its carry potential for your swing. A hybrid at an equivalent loft will typically deliver 5 to 8 yards (4.6 to 7.3m) more carry with more consistent smash factor for mid-handicap golfers, because the lower center of gravity makes it easier to launch cleanly from a full swing. What matters is whether the hybrid fills your specific gap (I know I'm probably too data-focused to weight feel properly in that calculation), not whether it matches a generic benchmark.
If your carry averages are consistently short across the whole bag relative to your swing speed, bag composition isn't the constraint. When your numbers are low for the effort you're putting into the swing and your smash factor is consistent, the issue is ball speed, not gapping. An instructor working on contact and mechanics will deliver more scoring improvement than a bag overhaul.
Hit 10 shots, then drop the highest and lowest carry reading. Average the remaining eight. That's your carry number for that club. If you're short on time, eight shots with two outliers dropped gives you 6 data points, which is the minimum for a reliable average. Below that, a single good or bad swing moves your number enough to skew your decisions.
Once a season is the baseline, plus any time you change clubs or notice your distances drifting. Carry distance changes with age, fitness, and swing changes, so a map from a few years ago won't reflect where you are now. A shorter check session (five or six shots per club, no outlier drops) every six months is enough to catch meaningful drift.
You don't have to own one, but you do need access to one. Many indoor golf facilities, fitting centers, and Golf Galaxy or PGA Tour Superstore locations have launch monitors available. If you're getting a fitting, ask for your raw carry data by club at the end; most fitters will share it. If you're deciding whether to buy, the consumer launch monitor guide has the comparison.
Once you've got per-club carry averages, build a two-column table: club on the left, carry on the right. Print it. Most golfers find that reviewing it before a round is enough to internalize the numbers after two or three sessions.
A pre-formatted distance chart PDF, with columns for carry, total distance, and ball speed so you can update it as your game evolves, is available via the site newsletter at newsletter signup link.
Some links in this article are affiliate links. If you buy through them, I earn a small commission at no extra cost to you. This never influences what I cover or recommend. I link to gear I'd buy myself.
Data-backed reviews and advice that works. No brand spin.