









how-to
How to Hit a Fairway Wood Off the Ground
You can smash a 3-wood off a tee. Put the same club on the turf and the
A par 3 tee shot is the approach shot. Here's how to pick the right club, aim at the smart target, and play your miss by handicap.

On a par 3, the tee shot is the approach shot. There's no lay-up to hide behind and no second chance to fix a bad club decision before the ball's already in the air. Learning how to play a par 3 well comes down to four decisions made before you swing: which club actually gets you to the green, where on the green you're really aiming, how you tee the ball, and where you'd rather miss if the shot doesn't come off exactly as planned.
The most common mistake on a par 3 isn't swing mechanics. It's standing over the ball between two clubs and picking the shorter one.
Mark Broadie's strokes-gained research, built from tracking amateur shot outcomes across handicap levels, shows why that instinct works against most golfers: approach shots miss short far more often than they miss long, and the gap widens as the yardage grows. A 15-handicap golfer hits something in the range of only 22 out of 100 greens from 150 to 200 yards (137 to 183m), and a big share of the misses that don't find the green come up short of it rather than past it. Adrenaline, a mis-hit, an uphill lie you didn't account for: all of it pulls a shot shorter than the number on the card suggests, rarely longer.
The fix is simple and unpopular: take one more club than you think you need, and swing it smoothly rather than forcing your "correct" club to its limit. A 7-iron swung easily is more repeatable than an 8-iron swung flat out, and it removes the most common way a good swing still comes up short.
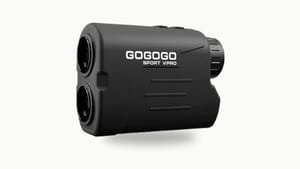
Elevation change is where this gets genuinely hard to judge by eye. A par 3 playing downhill needs less club than the scorecard yardage suggests; one playing uphill needs more, and the amount isn't intuitive from the tee box. This is where a rangefinder with slope adjustment, like the Bushnell Tour V7 Shift, earns its keep specifically on this hole type: it reads the true, elevation-adjusted number rather than the flat scorecard distance, which is exactly the gap that turns a well-struck shot into a short miss. On a tee shot where trees or a dogleg block your view of the pin, a GPS watch like the Garmin Approach S44 covers the same honest-yardage need without requiring a clean sightline to the flag.
Once the club is settled, the target matters more than most golfers treat it.
The instinct is to aim at the flag. The data says aim at the widest, safest part of the green instead, and let the flag be a bonus if you catch it. DECADE, the course-management system built by Scott Fawcett, puts a widely cited figure on this: something close to 70% of smart approach shots should finish on the fat side of the pin, the larger, safer portion of the green relative to any trouble around it, not tucked tight to the flag.
Our course management guide breaks this into a three-level system worth applying directly to a single par-3 shot: a Green Light pin sits in the middle of the green with nothing nearby, so you attack it directly; a Yellow Light pin sits closer to an edge or a bunker, so you play to the safe half of the green rather than tight to the flag; a Red Light pin is tucked behind real trouble, so the target becomes the center of the green and the flag gets ignored entirely. On a par 3, that entire decision happens in the few seconds before one swing, which is exactly why deciding the light before you're standing over the ball matters more here than on any other hole type.
Most golfers set the tee at the same height on every par 3 without thinking about it. That's a missed lever, not a neutral default.
A slightly higher tee changes launch conditions in ways that suit some shots and swings better than others. Jack Nicklaus was a long-time advocate of teeing the ball a touch higher on a par 3 than most players do, reasoning that air offers less resistance than turf, so a ball launched cleanly off a tee starts its flight with one less variable working against it. That's a genuine, credible alternative view, not the only correct answer; plenty of instructors default to a lower, more neutral tee height and get equally consistent results.
Treat tee height as something worth experimenting with on the range rather than a fixed rule to memorize. If you consistently catch iron shots a touch heavy or thin off a low tee, testing a slightly higher one is a low-cost adjustment worth trying before assuming the miss is a swing problem.
This is the most genuinely contested part of playing a par 3, and it's worth understanding both sides rather than picking one blindly.
Cameron McCormick, a well-known Titleist-affiliated instructor, argues that most golfers who aim away from their typical miss are actually making the miss worse: aiming at the target you're afraid of missing, rather than the real target, throws off the alignment sequence that would otherwise correct itself. His fix is to work on the alignment flaw directly, clubface first and body second, rather than building a strategy around a miss that shouldn't be happening in the first place.
John Hughes takes the opposite approach: golfers who have a known, repeatable miss should plan around it rather than fight it, aiming so that even the miss stays in play and advances the ball. Hughes's own framing is specific about who this is for, and it's worth taking seriously: knowing your miss well enough to plan for it requires having actually logged rounds and tracked where your shots go, not guessing at a pattern you assume is there. A golfer who hasn't done that tracking doesn't have a known miss to play to, only a guess, and playing to a guessed miss is worse than just aiming at the target. I'll admit my own instinct leans toward McCormick's side of this, correcting the cause rather than playing around it, but I'll also admit that's partly a personal bias toward fixing things at the source rather than a universal answer, and a golfer with genuinely reliable miss data has a real case for going the other way.
The right default answer shifts with your game, and the four steps above apply differently depending on where you sit.
Weekend golfer (roughly 18 handicap and up). Club selection is where you'll find the most strokes. Committing to Step 1's one-extra-club rule on every par 3, without exception, removes the single most common way a decent swing still turns into a bogey or worse. Aiming at the fat side matters too, but the club decision is the bigger lever at this level.
Improver (roughly 10 to 17 handicap). This is the range where Step 2's fat-side discipline starts paying off directly, since you're consistently reaching the green but not consistently controlling where on it you land. Pair that with starting a simple miss log, even a rough one, so Step 4's debate eventually has real data behind it instead of a guess.
Serious player (roughly single digits and below). The fat-side data isn't a hedge at this level, it's what the tour-level numbers actually support: even players who can flag-hunt more often than most still score better sticking closer to the DECADE ratio than deviating from it hole after hole. Tee height and miss patterns are worth fine-tuning specifically because the bigger levers are already dialed in.
None of the four steps above require a launch monitor or a rangefinder to practice. Four simple, no-cost proxies cover most of what the tech would tell you.
Keep a club-selection journal for a handful of rounds: write down the yardage and the club you actually hit, then note whether the shot came up short, long, or on the number. The pattern shows up fast, and it's usually more short misses than you'd guess before tracking it.
Run a fat-side-only rule on the range: pick a target line to the safe side of an imaginary pin and hit ten balls trying to stay on that side, not at the pin itself. It trains the same decision Step 2 asks for, without needing a real green to practice on.
Use step-off pacing to build a rough internal yardage sense between rounds: pace off a known distance, like the walk from your front door to the mailbox, and use it to calibrate your stride so you can rough-estimate yardage when you don't have a device on hand.
And run a post-round miss tally: after each round, jot down which direction and distance you missed on every par 3 you played. Over a handful of rounds, that tally is the same known-miss data Step 4's Hughes approach actually requires, built for free instead of guessed at. It's also the kind of tracking that would feed directly into a pin-position cheat sheet if you wanted to take the Green/Yellow/Red system a step further.
Not always, but it's the safer default when you're genuinely between two clubs. As Step 1 covers, misses on approach shots skew short far more often than long, so when the choice is close, the longer club swung smoothly is usually the better bet than forcing the shorter one to its limit.
Aim at the center of the green, not the flag. A tucked, or "Red Light," pin per the DECADE course-management system is surrounded by real trouble, so the smart target becomes the safest, widest part of the green, even if that means giving up a shot at a tight pin position.
It can. A slightly higher tee changes launch conditions in a way some golfers and some shots benefit from, an approach Jack Nicklaus favored, though plenty of golfers play a lower, neutral tee height with equally consistent results. It's worth testing on the range rather than assuming one height is correct for everyone.
Instructors genuinely disagree. Some argue fixing the alignment flaw that causes a repeated miss is the better long-term answer; others argue a known, tracked miss should be planned around rather than corrected mid-round. The second approach only works if you actually have logged data on your own miss pattern, not a guess.
For the two-shot sibling to this piece, see our guide on how to play a par 5. For whole-round risk management beyond any single hole type, see how to avoid big numbers. And if you're building a complete course-management system rather than working hole by hole, our Break 100 paperback walks through the full scoring framework this article's Green, Yellow, and Red zones are drawn from.
Some links in this article are affiliate links. If you buy through them, I earn a small commission at no extra cost to you. This never influences what I cover or recommend. I link to gear I'd buy myself.
Data-backed reviews and advice that works. No brand spin.