








How to Set Ball Position for Every Club

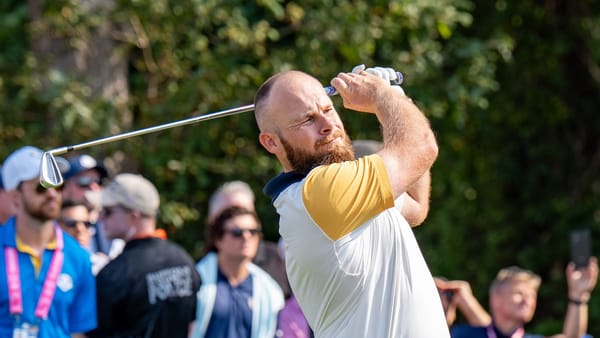
Ball position steps forward with the club: centered for short irons, teed higher near the lead heel for the driver.
Ball position isn't a single spot you set once and reuse for every club in the bag. It moves, club to club, because the goal never changes: get the ball exactly where the clubhead's low point produces the strike you're after. Here's the full map by club, the low point logic behind it, and a no-ball drill that checks your own setup without a single purchase.
- The full map: driver near the lead heel, wedges near center, and every club between the two mapped out below.
- It's about low point: irons and wedges want a descending strike before low point; the driver wants to catch the ball on the way up.
- No ball needed to check it: take your setup, let the club sole where it naturally bottoms out, then place the ball there.
- Four faults to watch: too far forward, too far back, one spot for every club, and a hip sway that drags your low point back mid swing.
- No launch monitor required: a club or towel on the ground gives honest feedback for free.
The ball position chart
Start with the map. Every position below is described relative to your lead heel, the heel of the foot nearer the target, so use that as your anchor point reading down the chart rather than the center of your stance or a line painted on the grass.
| Club | Ball position | Stance width | Strike |
|---|---|---|---|
| Driver | Just inside the lead heel | Widest | Ascending, hit on the way up |
| Fairway wood | About a ball-width inside the lead heel, roughly 1 inch (2.5cm) back of the driver spot | Wide | Near level to shallow descending |
| Hybrid | 1 to 2 inches (2.5 to 5cm) forward of a 7-iron spot, just forward of the middle of your stance | Medium to wide | Shallow descending |
| Long irons (4-5) | Roughly 2 to 3 inches (5 to 7.5cm) inside the lead heel | Medium | Descending |
| Mid irons (6-8) | 1 to 2 inches (2.5 to 5cm) forward of center | Medium to narrow | Descending |
| Short irons (9-iron, PW) | Center of stance | Narrow | Steeper descending |
| Wedges | Center to slightly back of center | Narrowest | Steepest descending |
Why ball position moves: it comes down to low point
The driver and the irons move in opposite directions for one reason: where the clubhead bottoms out. Every swing has a low point, the spot on the ground where the club stops descending and starts rising again, and irons and wedges are built to strike the ball before that low point arrives, catching it on a descending blow. Our guide to compressing the ball with irons lays out the exact ranges: center of stance for short irons, 1 to 2 inches (2.5 to 5cm) forward of center for mid irons, and roughly 2 to 3 inches (5 to 7.5cm) inside the lead heel for a 4 or 5-iron. It also states the boundary plainly: the ball should never sit so far back that a descending blow becomes impossible, and never so far forward that the club is already past its low point and moving upward when it arrives at impact. Everything in the chart above lives inside those two limits.
A hybrid splits the difference between a mid-iron and a fairway wood. Our hybrid how-to puts it 1 to 2 inches (2.5 to 5cm) forward of where you'd position a 7-iron, just forward of the middle of your stance, not as far forward as you'd play a fairway wood.
The driver flips the logic entirely. Teed up, it's played just inside the lead heel so the club is already rising when it arrives, which is how a driver gets its higher launch and lower spin instead of a divot. Ball position decides how badly a low point error gets punished: an iron played centered can still catch some ball even if the low point arrives a touch early, while a driver played too far back loses that cushion entirely.
How to set your ball position
1. Set your feet to the target line first. Build your stance and aim before you worry about ball position at all. Take your regular grip (our guide to gripping a club covers that if it still feels unsettled) and set your feet, hips, and shoulders square to the target line. Ball position only means something once the rest of your setup is already square; move the ball first and you're compensating for a stance problem instead of fixing one.
2. Find your lead-heel reference point. With your stance set, locate the inside of your lead heel, the foot nearer the target. Every position in the chart above is described relative to that point, not the center of your stance or an arbitrary spot on the grass, so it's the one landmark worth finding by feel before you place a single ball.
3. Move the ball per club from that reference. Starting with the driver near your lead heel, work backward through the bag: fairway wood about a ball-width further back, hybrid roughly 1 to 2 inches (2.5 to 5cm) forward of a 7-iron spot, long irons 2 to 3 inches (5 to 7.5cm) inside the lead heel, mid irons 1 to 2 inches (2.5 to 5cm) forward of center, and short irons and wedges settling in at center or just behind it. Golf Launch Lab's stance guide makes the same point about width: widest with the driver, narrowest with the wedges, so the wider base isn't incidental. It's doing real work keeping you balanced through a longer swing.
4. Check your work with the no-ball drill. Before you trust any of the numbers above, test them without a ball at all. Take your grip and posture for the club in your hand, make a few practice swings, and watch where the sole naturally brushes the grass. That spot is your actual low point for that club, in that stance, on that day, and it's a more honest reference than any number on a chart. Once you've found it, place the ball relative to that spot rather than building your stance around a ball that's already sitting on the ground.
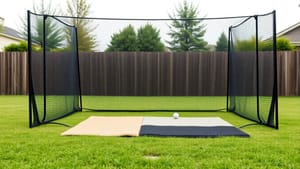
A club or a towel laid on the ground as a reference line does this for free: lay it where your lead heel sits, make your practice swings, and compare where the club actually bottoms out against the line. If you'd rather use something built for the job, the IZZO Golf Sure Stance Ball Position Trainer is a dedicated option built around the same lead-heel reference, and the Cusprtm Magnetic Golf Stance Towel & Alignment Aid does a similar job for less. Neither is required. The drill works with a towel from the hall closet; the trainers just make the reference line a little easier to set up the same way twice.
Common ball position faults
Golf Monthly and HackMotion both cover these four faults as the most common ball position mistakes, and all four trace back to the low point logic above.
Too far forward with irons. Symptom: fat contact, or a thin strike as the club is already climbing when it arrives. Cause: the ball has moved past the point where the descending blow still works, so the club either digs in behind it or catches it on the rise. Fix: walk the ball back toward center using the chart above, 1 inch (2.5cm) at a time, until contact cleans up.
Too far back. Symptom: low, weak shots that start right of target, often with a deep divot taken after the ball. Cause: the club reaches the ball well before its low point, on a steep, still-descending path, and before the face has finished closing. Fix: move the ball forward toward the position listed for that club, checking against the lead-heel reference rather than eyeballing it.
One fixed spot for every club. Symptom: contact that seems to come and go for no reason, club to club. Cause: a single ball position, usually the middle of the stance, applied to every club in the bag regardless of shaft length or swing shape. It's a tendency I recognize in my own setup: left unchecked, my feet default to the same middle-of-stance spot out of pure habit, and I have to consciously walk it forward or back depending on what's actually in my hands that swing. Fix: use the chart above as a starting reference and adjust club by club, not once for the whole bag.
A good setup undone by sway. Symptom: fat and thin shots showing up in the same session despite a ball position that looked correct at address. Cause: a hip sway during the swing drags the low point back from where it was set at address, so a position that looked right standing still is wrong by the time the club arrives. Our guide to stopping topped shots covers the sway fix directly; ball position alone can't correct for it.
Frequently Asked Questions
Where should the ball be for a driver?
Just inside your lead heel. The driver is the one club in the bag struck on the way up rather than on the way down, so playing it forward lets the club catch the ball after the swing's low point, which is what produces a driver's higher launch and lower spin. It's also why the driver gets the widest stance of any club: a longer swing needs a wider base to stay balanced through it.
Does ball position affect my aim and alignment?
Yes. Playing the ball too far back in your stance tends to close your shoulders as a compensation, while playing it too far forward opens them, according to our guide to aiming and aligning correctly. A teed-up driver shot also moves the ball forward and widens the stance compared to an iron, which is why a setup that looks square with an iron in your hands can read differently once the driver comes out. Worth checking the two separately rather than assuming one alignment check covers both.
Why does the ball move back in the stance for low, punched shots?
Moving the ball back in the stance delofts the club and steepens the angle of attack, which is exactly what a low shot under branches or into the wind needs, as our guide to hitting a punch shot out of trees covers directly. For especially low branches, that guide has the ball moved back a little further still. It's a deliberate exaggeration of the same descending-strike logic that puts irons ahead of center in a normal setup, just taken further for a specific trajectory.
Do left-handed golfers set up differently?
No. Every position above is described relative to your lead foot, the foot nearer the target, so the chart already works whichever way you set up. Mirror your stance as a left-handed golfer and the same lead-heel reference point still applies without flipping a single number.
Do I need a launch monitor to check my ball position?
No. A club or towel laid on the ground as a reference line, combined with the no-ball drill above, gives direct feedback on where your club is actually bottoming out without any data at all. A launch monitor can confirm launch angle and spin once your position is set, but it isn't required to learn or groove any of this.
Getting it right
Ball position is one of the cheaper fixes in golf, in the sense that it costs nothing but attention. Set your stance and grip first, find your lead-heel reference, move the ball per club using the chart above, and confirm it with the no-ball drill before you trust it on the course. None of it requires new equipment, though a dedicated trainer can make the reference line a little easier to repeat if you'd rather not improvise one from a towel.
Some links in this article are affiliate links. If you buy through them, I earn a small commission at no extra cost to you. This never influences what I cover or recommend. I link to gear I'd buy myself.
The golf newsletter that cuts the hype
Data-backed reviews and advice that works. No brand spin.